25 Easy Crafts for Kids That Are Seriously Budget-Friendly Creative Fun
Keeping kids entertained can be a challenge, especially when you’re on a budget. Luckily, there are plenty of fun and creative craft projects that won’t break the bank. These activities not only provide hours of entertainment but also help develop important skills like fine motor coordination and creative thinking.
You can easily find affordable materials for these crafts around your home or at dollar stores. With just a few simple supplies, you’ll be able to engage your children in exciting projects that spark their imagination.
From colorful paper crafts to recycled art creations, there’s something for every age group and interest. Get ready to explore a world of budget-friendly kids crafts that will keep little hands busy and minds inspired.
25 Easy Crafts for Kids
1) Paper Plate Masks
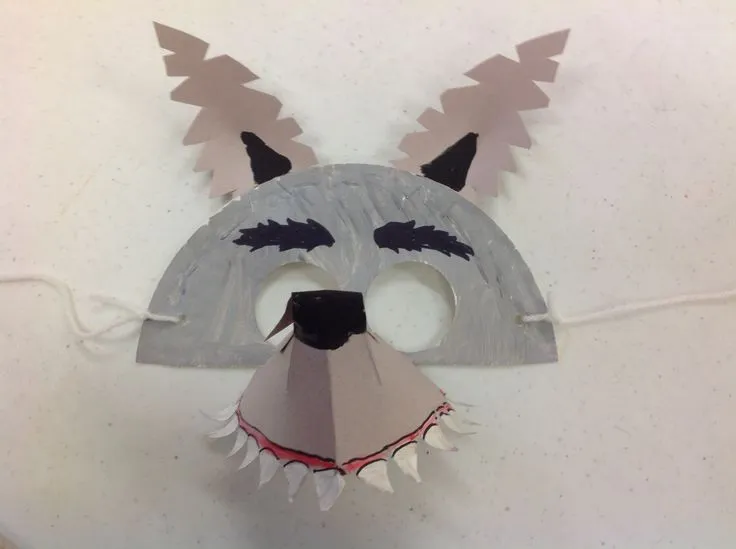 Paper plate masks are a fun and affordable craft for kids. You can easily transform ordinary paper plates into creative disguises using simple materials.
To start, gather paper plates, markers, scissors, and elastic string. Cut eye holes in the plate and decorate the front with markers or paint to create characters like animals or superheroes.
Wolf masks are popular options. Cut the plate into a half-moon shape and add a cone-shaped nose. Draw eyebrows with a black marker to complete the look.
For a fancier touch, try making masquerade masks. Decorate the plate with feathers, glitter, and sequins. Add a contrasting zig-zag piece of card at the top for extra flair.
Superhero masks are another exciting choice. Cut the plate into a mask shape and paint it in your favorite hero’s colors. Glue on symbols or logos to represent different characters.
Attach elastic string to the sides of the mask so kids can wear their creations. This step makes the masks perfect for imaginative play or DIY costumes.
You can also use recyclable materials to enhance your masks. Add colorful yarn for hair or cut shapes from construction paper for additional features.
Paper plate masks offer endless possibilities for creativity. Encourage your children to design unique characters or recreate their favorite storybook personalities.
2) Toilet Roll Binoculars
 Toilet roll binoculars are a fun and easy craft for kids. You’ll need two empty toilet paper rolls, glue, paint or markers, and string.
Start by decorating the rolls with paint or markers. Let your children choose their favorite colors and designs. Allow the paint to dry completely before moving on.
Once dry, apply glue along the side of one roll and press the second roll against it. Hold them together until the glue sets.
Punch a hole on both sides of the tubes, about 1/4 inch from the edge. This will prevent tearing when you attach the strap.
Cut a piece of string or ribbon about 2 feet long. Thread it through the holes to create a strap for the binoculars.
You can add a dollop of hot glue inside the binoculars to secure the string. Be careful with hot glue and supervise children during this step.
For extra flair, you can add stickers or draw designs on the binoculars. Encourage your kids to be creative with their decorations.
These homemade binoculars are perfect for imaginative play. Your children can use them for pretend birdwatching, exploring, or as part of a costume.
This craft is not only fun but also teaches kids about recycling and turning everyday items into toys.
3) Egg Carton Caterpillars
 Egg carton caterpillars are a fun and easy craft that kids will love. You can transform an ordinary egg carton into an adorable caterpillar with just a few simple materials.
To start, cut an egg carton into a strip of 4-6 cups. This length is perfect for creating a caterpillar body that’s manageable for children to paint and decorate.
Paint the egg carton segment in bright colors. Let your kids choose their favorite hues to make their caterpillar unique. Once the paint is dry, it’s time to add some personality to your creation.
Use pipe cleaners to make antennae. Poke two small holes in the front cup and insert the pipe cleaners. Bend them slightly for a realistic look.
Glue on googly eyes to bring your caterpillar to life. You can use markers to draw a smile or add other facial features if desired.
For the finishing touch, attach small pom-poms or buttons along the caterpillar’s back. This adds texture and makes each creation one-of-a-kind.
This craft is an excellent way to teach kids about recycling while fostering their creativity. It’s a perfect activity for rainy days or when you need a quick and engaging project.
You can extend the fun by creating a whole family of caterpillars in different sizes and colors. Encourage your children to name their new caterpillar friends and make up stories about them.
4) Friendship Bracelets
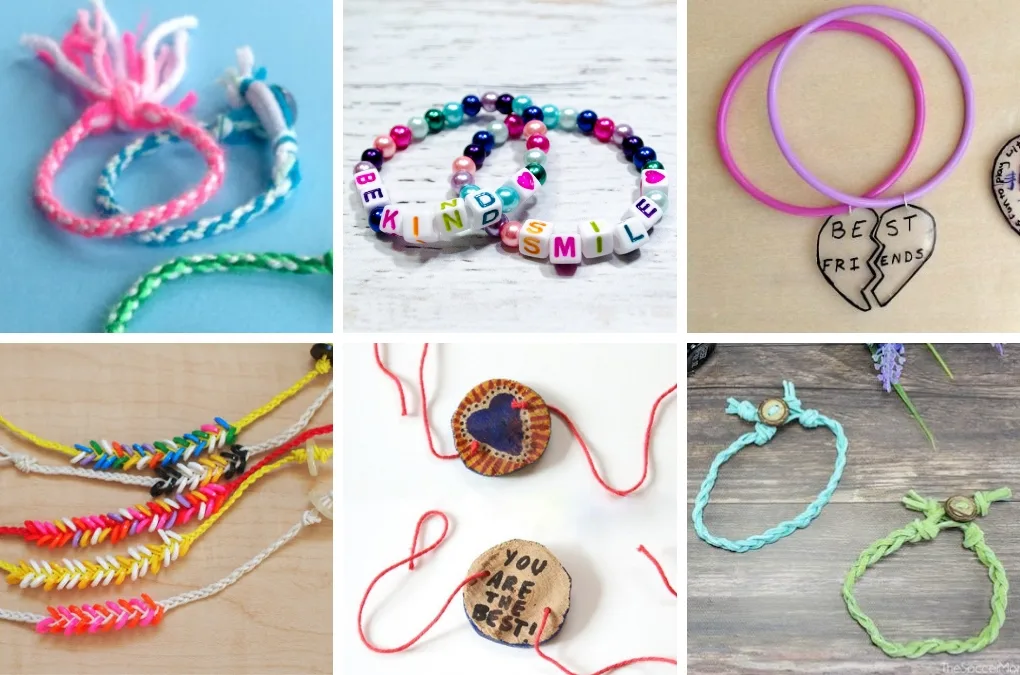 Friendship bracelets are a classic craft that kids love. They’re inexpensive, fun to make, and perfect for sharing with friends. You only need some colorful embroidery floss or string to get started.
Easy friendship bracelets come in various styles. The simplest version involves braiding three strands of thread together. This technique is ideal for younger children or beginners.
For slightly older kids, the knotted friendship bracelet is a popular choice. You’ll need to learn a few basic knots, but with practice, you can create intricate patterns and designs.
If you’re looking for a quicker option, try making t-shirt yarn bracelets. These are super chic and easy to make. Plus, you can upcycle old shirts, making it an eco-friendly craft.
Another fun variation is the beaded friendship bracelet. You can add beads to your knotted or braided designs for extra flair. This allows for even more creativity and personalization.
Remember, the beauty of friendship bracelets lies in their handmade nature. Encourage your kids to experiment with different colors and patterns. They can create unique designs that reflect their personality or match their friends’ favorites.
Making friendship bracelets is also a great group activity. You can organize a bracelet-making party where kids can create and exchange bracelets with their friends. It’s a wonderful way to foster creativity and strengthen friendships.
5) Popsicle Stick Puppets
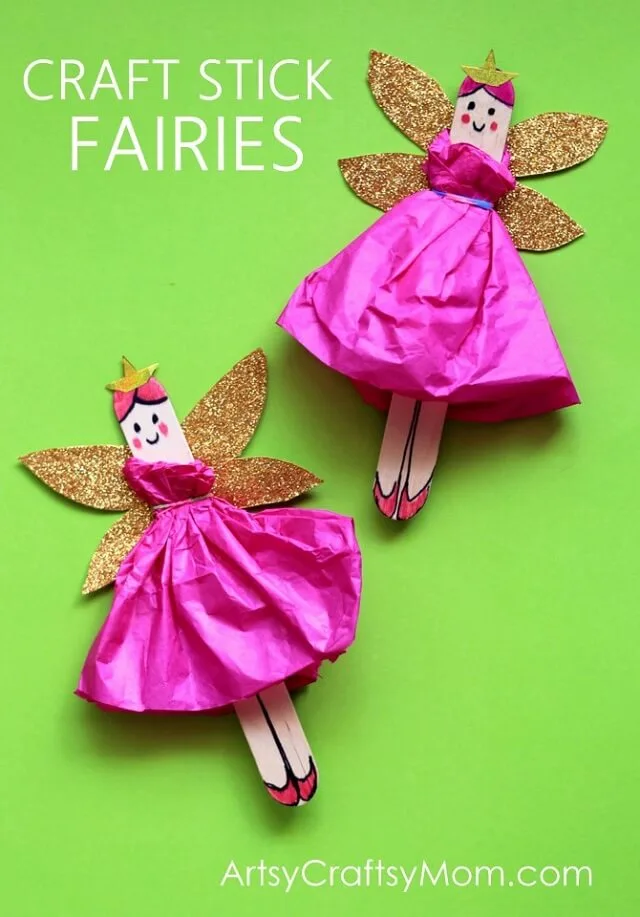 Popsicle stick puppets are a delightful and inexpensive craft for kids. You’ll need popsicle sticks, markers, glue, and colorful craft paper to get started.
Begin by selecting a character or animal for your puppet. Draw the face directly on the popsicle stick using markers, or cut out shapes from craft paper to create features.
For hair, cut strips of paper or yarn and glue them to the top of the stick. You can add accessories like hats or bows by cutting small shapes and attaching them.
To make clothing, cut simple shapes from craft paper and glue them to the lower part of the stick. Create unique outfits for each puppet to give them personality.
Add arms by gluing smaller popsicle sticks horizontally near the top. You can even create jointed arms using paper fasteners for movable limbs.
Encourage your kids to make multiple puppets to form a cast of characters. They can use these to put on their own puppet shows, stimulating creativity and storytelling skills.
Popsicle stick puppets are versatile and can be adapted to any theme. Create fairy tale characters, animals, or even family members for endless imaginative play.
This craft is suitable for various age groups. Younger children can focus on simple designs, while older kids can add more intricate details to their puppets.
6) Yarn Wrapped Letters
 Yarn wrapped letters are a fun and inexpensive craft for kids to create personalized decor for their rooms. You’ll need cardboard, yarn in various colors, and glue to get started.
Begin by cutting out letter shapes from cardboard. You can freehand these or use stencils for more precise shapes. Choose letters that spell out your child’s name or initials.
Start wrapping the yarn around the cardboard letter, securing it with glue as you go. Wrap, wrap, wrap until the entire letter is covered. You can use a single color or switch colors to create patterns.
For a neater finish, glue the yarn to the back of the cardboard at the beginning and end of each section. This will prevent unraveling and give a polished look.
Encourage your kids to get creative with color combinations. They can make ombre effects by gradually changing yarn colors or create stripes by alternating colors.
Once complete, these yarn-wrapped cardboard letters make great wall art for bedrooms. You can hang them individually or string them together to spell out words.
This craft is suitable for various ages. Younger children might need help with gluing and wrapping, while older kids can handle the project independently.
Yarn wrapped letters are not only decorative but also help improve fine motor skills and color recognition. Plus, they offer a sense of accomplishment when kids see their finished creations on display.
7) Spoon Puppets
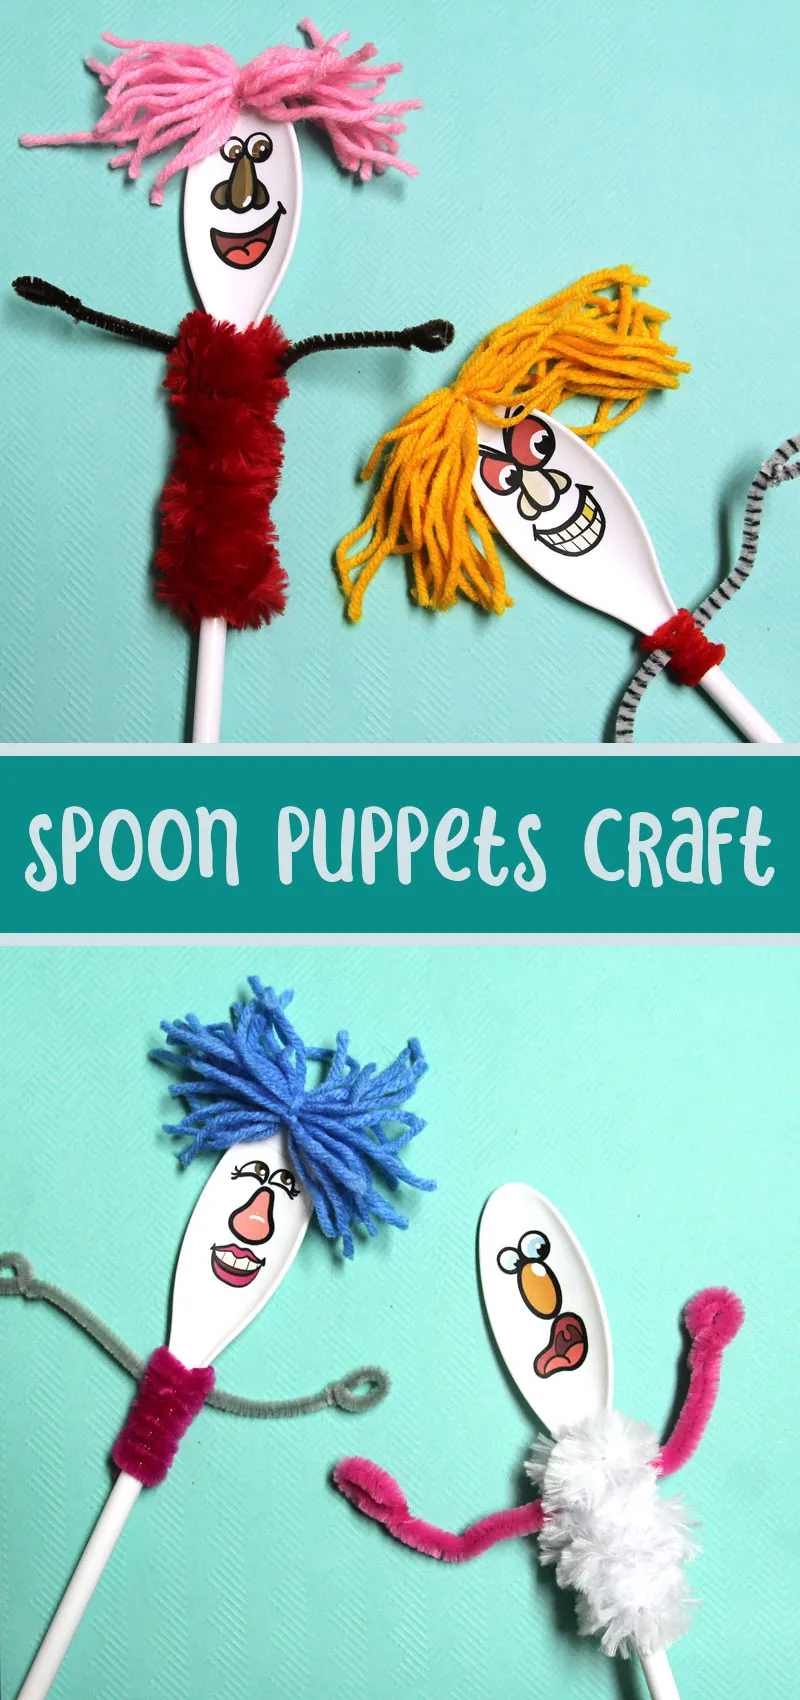 Spoon puppets are a delightful and budget-friendly craft that will spark your child’s creativity. You’ll need wooden spoons, craft supplies, and a dash of imagination to get started.
Begin by adding stickers to the spoons to create silly faces. This simple step can be enough for younger children, but older kids might want to take it further.
For clothing, use felt or fabric to dress up your puppet. Felt works well as it doesn’t fray at the edges. Glue the fabric to the spoon and add pipe cleaner arms for extra flair.
Want to give your puppet some personality? Try adding yarn hair. Wind yarn around your hand a few times, then tie it off with another piece of yarn before attaching it to the spoon.
You can create various characters with spoon puppets. Try making a fancy lady or a ladybug spoon puppet by painting the spoon red and adding black spots.
This craft is versatile and can be adapted for different themes or seasons. It’s an excellent way to encourage storytelling and imaginative play in your children.
Remember, you can find wooden spoons at your local dollar store or order them in bulk online. With a few basic supplies, you’ll have everything you need for this fun and engaging craft activity.
8) Homemade Playdough
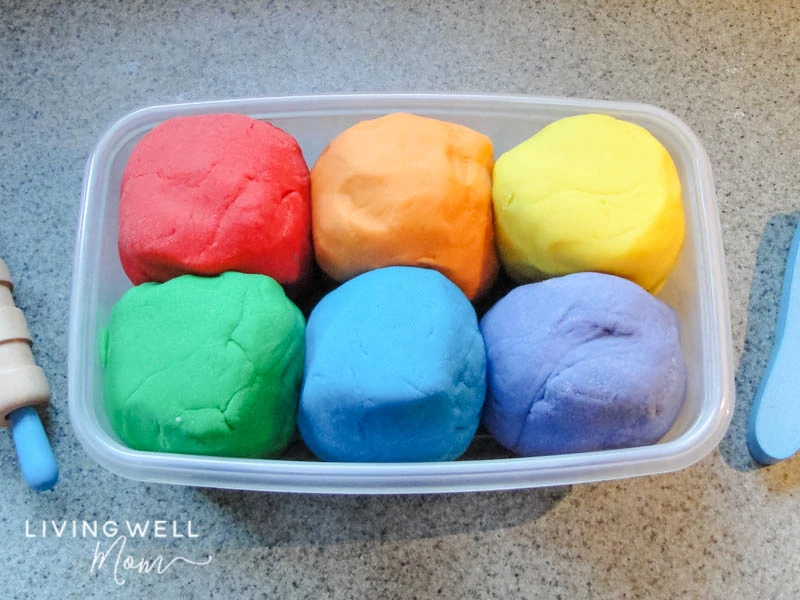 Making playdough at home is a fun and budget-friendly activity for kids. You can create this classic toy using simple ingredients from your kitchen.
To make basic homemade playdough, you’ll need flour, cream of tartar, salt, water, and oil. Mix the dry ingredients in a saucepan, then add the wet ingredients and cook over medium heat until it forms a dough.
You can customize your playdough by adding food coloring during the mixing process. Experiment with different colors to create a rainbow of options for your children to play with.
For a no-cook version, try an easy 3-ingredient recipe using oats, water, and flour. This method adds an interesting texture to the playdough and requires no heating.
Store your homemade playdough in airtight containers or plastic bags to keep it fresh. With proper storage, it can last for months.
Encourage your kids to get creative with their playdough. They can shape animals, make pretend food, or create colorful sculptures. This activity helps develop fine motor skills and sparks imagination.
Remember to supervise young children when playing with homemade playdough, as it’s not meant to be eaten. If you’re concerned about ingestion, you can use natural food coloring options.
Making playdough at home is not only cost-effective but also allows you to control the ingredients. This is especially helpful if your child has allergies or sensitivities to certain substances found in store-bought versions.
9) Button Bracelets
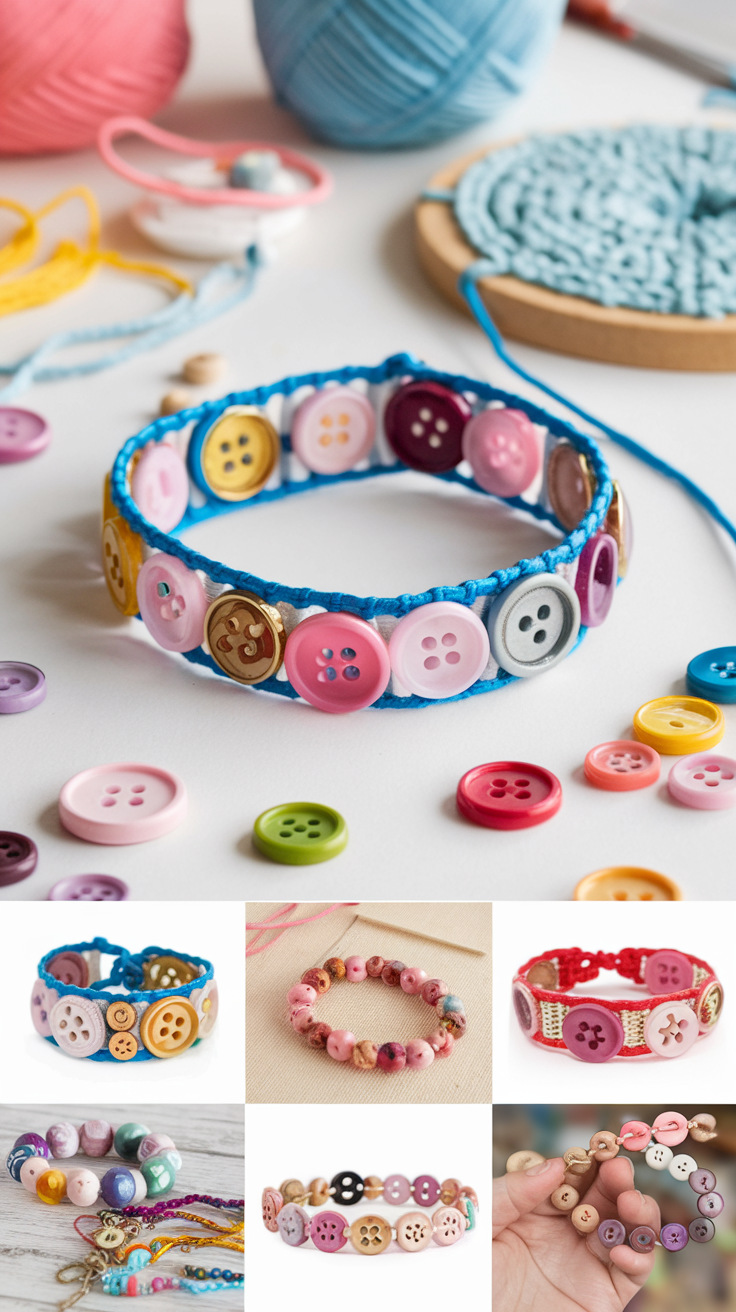 Button bracelets are a fun and easy craft that kids will love making. You only need a few simple materials to get started: buttons, elastic cord, and scissors.
Begin by cutting a piece of elastic cord long enough to fit around your child’s wrist with some extra length for tying. Let your child select their favorite buttons in various colors and sizes.
Thread the buttons onto the elastic cord, encouraging your child to create unique patterns. They can alternate colors or group similar buttons together for a cool effect.
Once the cord is filled with buttons, tie the ends securely. Make sure the knot is tight enough to hold all the buttons in place. Trim any excess cord for a neat finish.
Button bracelets make great gifts for friends and family. Your child can create personalized designs using buttons that match the recipient’s favorite colors or interests.
This craft is perfect for improving fine motor skills and hand-eye coordination. It also teaches basic pattern recognition and design principles in a fun, hands-on way.
You can find buttons at thrift stores, in old clothing, or purchase them inexpensively at craft stores. This makes button bracelets a budget-friendly activity that yields charming results.
For added flair, try incorporating other small items like beads or charms alongside the buttons. This allows for even more creativity and personalization in your child’s bracelet designs.
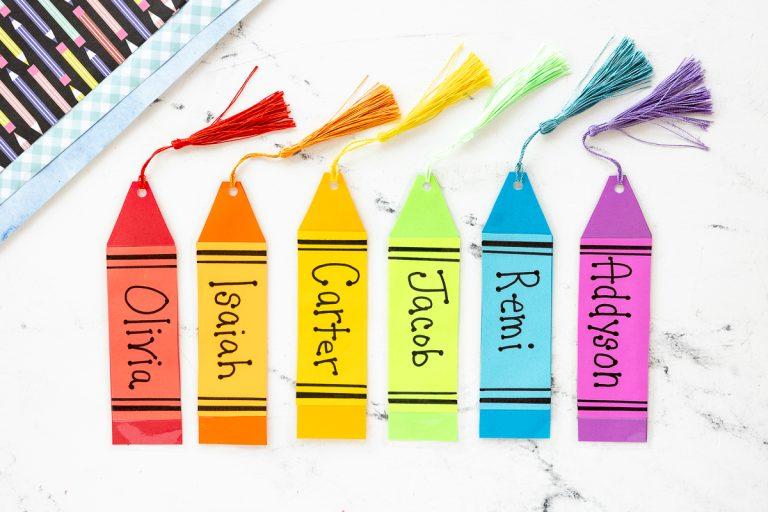
10) Fabric Scrap Bookmarks
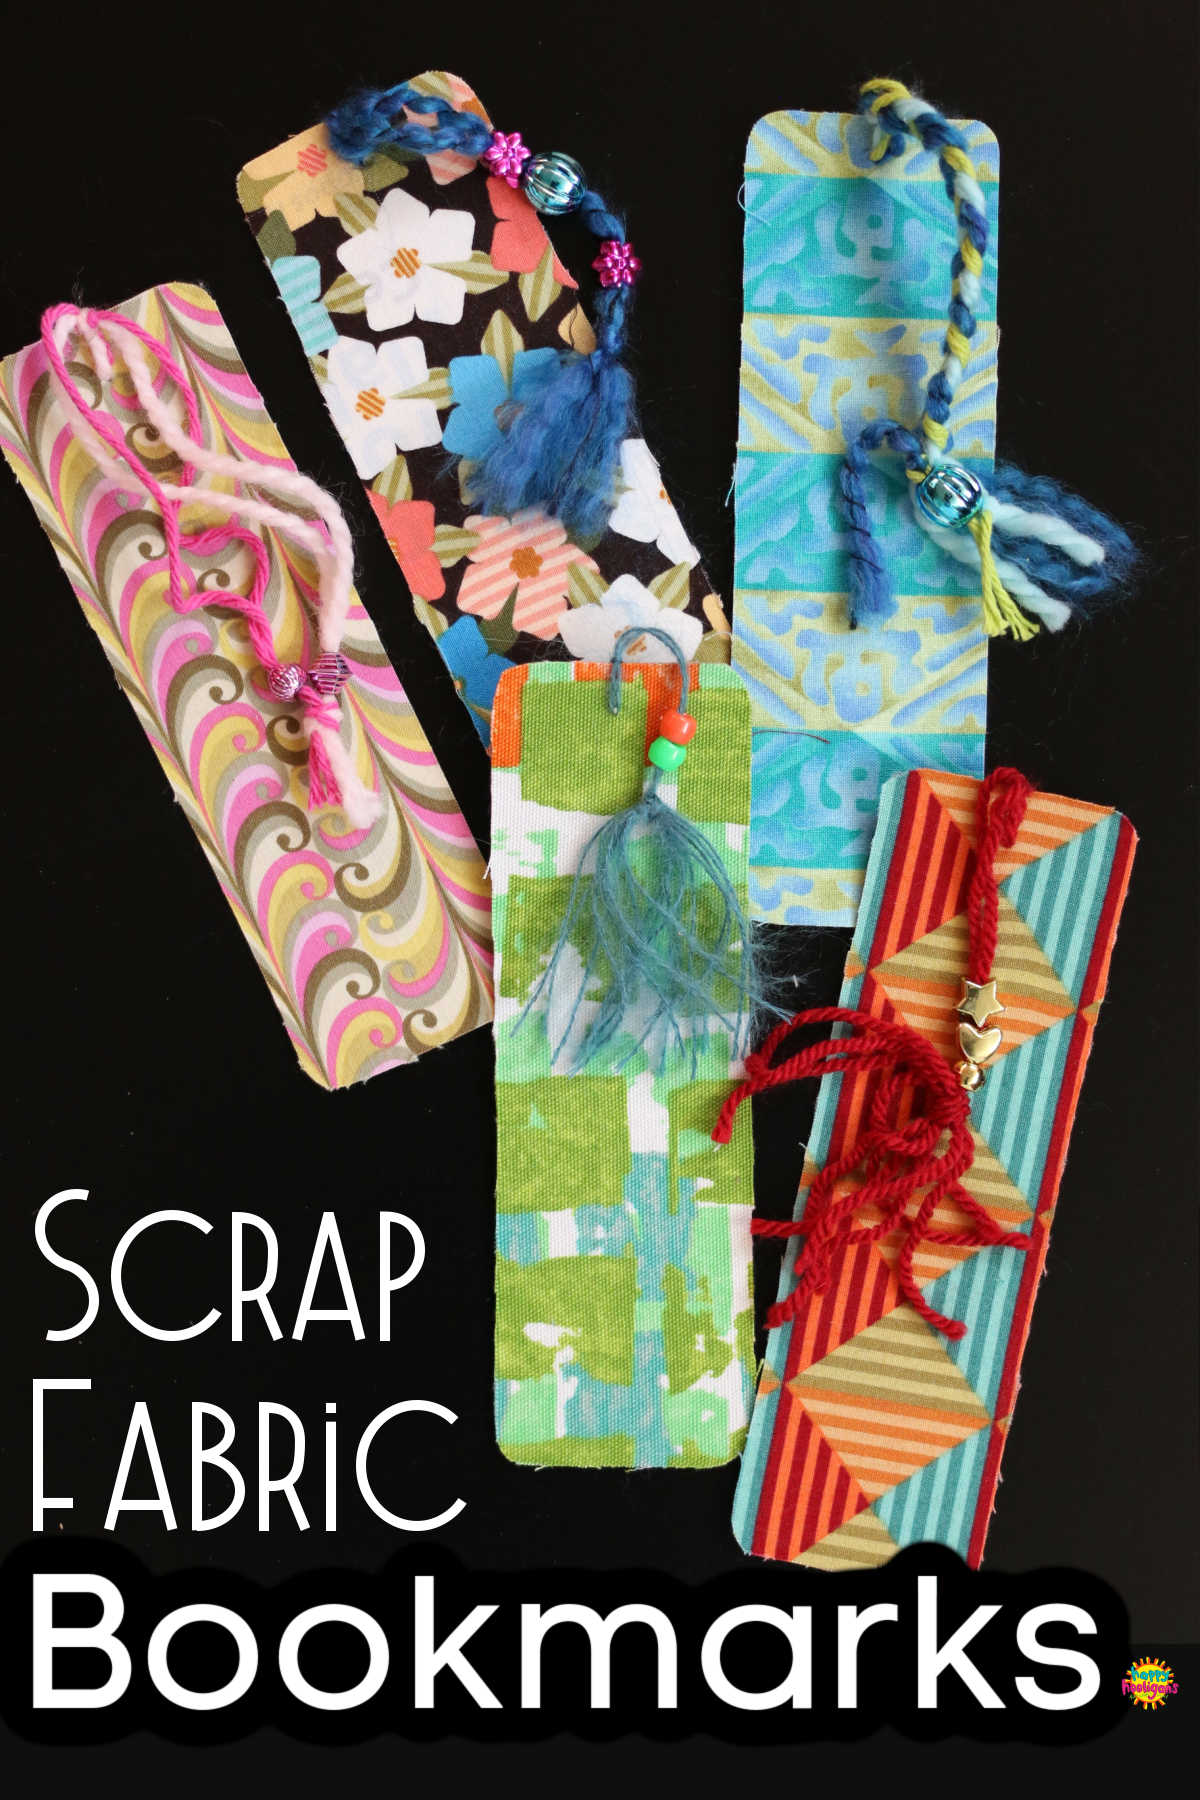 Fabric scrap bookmarks are a perfect craft for kids to create personalized reading accessories. This project is both practical and fun, allowing children to express their creativity while making something useful.
To start, gather fabric scraps, cardboard, and glue. Cut the cardboard into bookmark-sized rectangles. Let the kids choose their favorite fabric pieces to cover the cardboard.
No-sew fabric bookmarks are an excellent option for younger children. Simply wrap the fabric around the cardboard and secure it with glue. This method is quick and easy, requiring minimal supervision.
For a more durable option, consider using fusible interfacing. Cut the interfacing to match the fabric size, then iron it onto the wrong side of the fabric. This adds strength to the bookmark and prevents fraying.
Encourage kids to mix and match different fabric patterns for a unique look. They can create themes based on their favorite colors, animals, or seasons.
Add a personal touch by attaching buttons, ribbons, or small charms to the top of the bookmark. This not only enhances the design but also makes it easier to find the reading page.
Fabric bookmarks with pockets are another fun variation. These can hold small notes or reading trackers, making them extra functional for avid readers.
For a quilted effect, try the quilt-as-you-go method. This technique allows kids to create a patchwork design by sewing fabric scraps directly onto batting.
Fabric scrap bookmarks make excellent gifts for friends, teachers, or family members. Encourage kids to create sets of bookmarks for special occasions or as thoughtful handmade presents.
11) No-Sew Sock Puppets
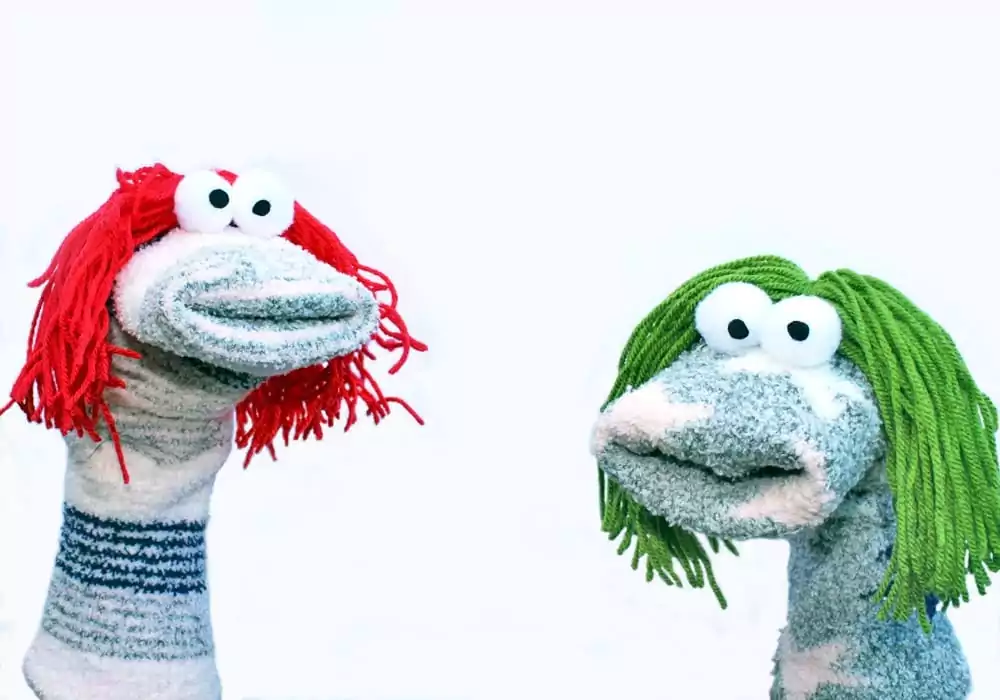 No-sew sock puppets are a fantastic craft for kids that’s both fun and budget-friendly. You can create adorable characters using old socks and a few simple materials.
To start, gather some clean socks, googly eyes, glue, and decorative items like pom-poms or felt. Googly eyes bring your sock craft to life and give it personality.
Slide your hand into the sock to create the puppet’s mouth. Use a piece of cardboard to make a sturdy mouth shape inside the sock. This helps the puppet “talk” more effectively.
Glue on the googly eyes where you want them. Add a nose using a pom-pom or a small piece of felt. You can create ears by pinching and tying off small sections of the sock with rubber bands.
For hair, consider using yarn or cutting fringes into felt pieces and gluing them on. Pipe cleaners can make great antlers if you’re creating a deer or reindeer puppet.
Encourage your kids to get creative with their puppet designs. They can make animals, monsters, or even characters from their favorite stories.
This craft is perfect for rainy days or when you need a quick, engaging activity. Plus, it’s a great way to upcycle old socks that might otherwise be thrown away.
12) Bead Keychains
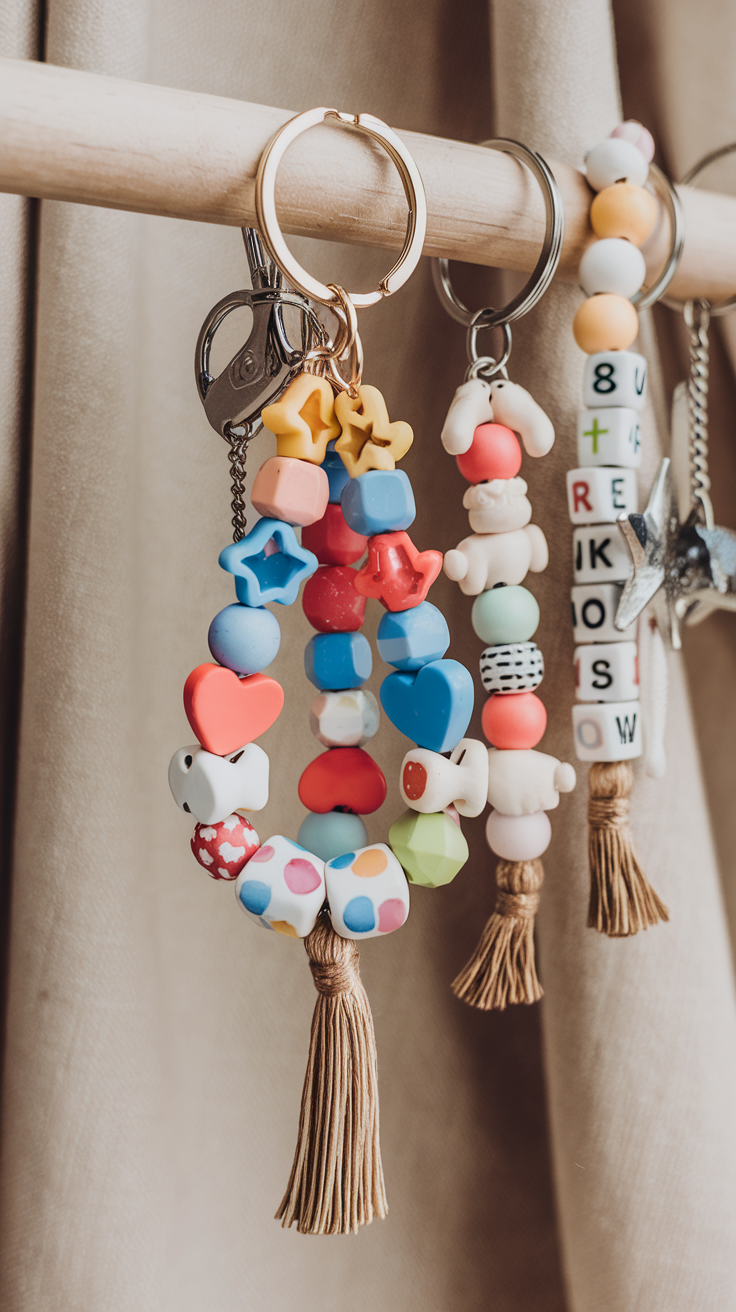 Bead keychains are a classic craft that kids love. They’re simple to make and offer endless opportunities for creativity. You’ll need beads, string or cord, and key rings to get started.
Choose colorful plastic pony beads for younger children. These large beads are easy to handle and come in a variety of bright colors. For older kids, consider using smaller glass beads for a more refined look.
Cut a length of cord about 12 inches long. Thread one end through the key ring, folding it in half. Now you’re ready to start adding beads.
Let your child select their favorite bead colors and patterns. They can create stripes, rainbows, or spell out their name. Encourage them to experiment with different combinations.
Thread the beads onto both strands of cord, pushing them up towards the key ring. Continue until the beaded section is about 3-4 inches long.
Tie off the end of the beaded section with a secure knot. Trim any excess cord, leaving a small tail for a finishing touch.
For added flair, attach charms or pendants to the key ring. Your child can personalize their keychain with initials, animal shapes, or other fun trinkets.
These beaded keychains make great gifts for friends and family. Encourage your kids to make extras for birthdays or holidays. They’re practical, personal, and sure to bring a smile to anyone’s face.
13) Handprint Art

Handprint art is a classic kids’ craft that’s both cheap and fun. You only need paint and paper to get started. Let your child dip their hand in washable paint and press it onto paper to create unique designs.
Try making handprint animals like turkeys, penguins, or hedgehogs. These crafts are perfect for holidays or any time of year. You can also use handprints to make flowers, trees, or even a family portrait.
For a twist, use different colors for each finger. This technique works great for making rainbow fish or peacocks. You can also add details with markers or crayons after the paint dries.
Consider making seasonal handprint art. Create spooky Halloween ghosts or festive Christmas trees. Valentine’s Day is ideal for handprint hearts. These make thoughtful homemade gifts for family members.
Don’t forget about footprints too. They’re great for making butterflies or monsters. Combine handprints and footprints to create even more imaginative creatures.
Clay handprint ornaments are another fun option. They make wonderful keepsakes to look back on as your child grows. You can paint them after they dry for added flair.
Remember to have wipes or a wet cloth ready for easy cleanup. Washable paint is best for younger kids. With older children, you might experiment with fabric paint on t-shirts or canvas bags for longer-lasting creations.
14) Pipe Cleaner Animals
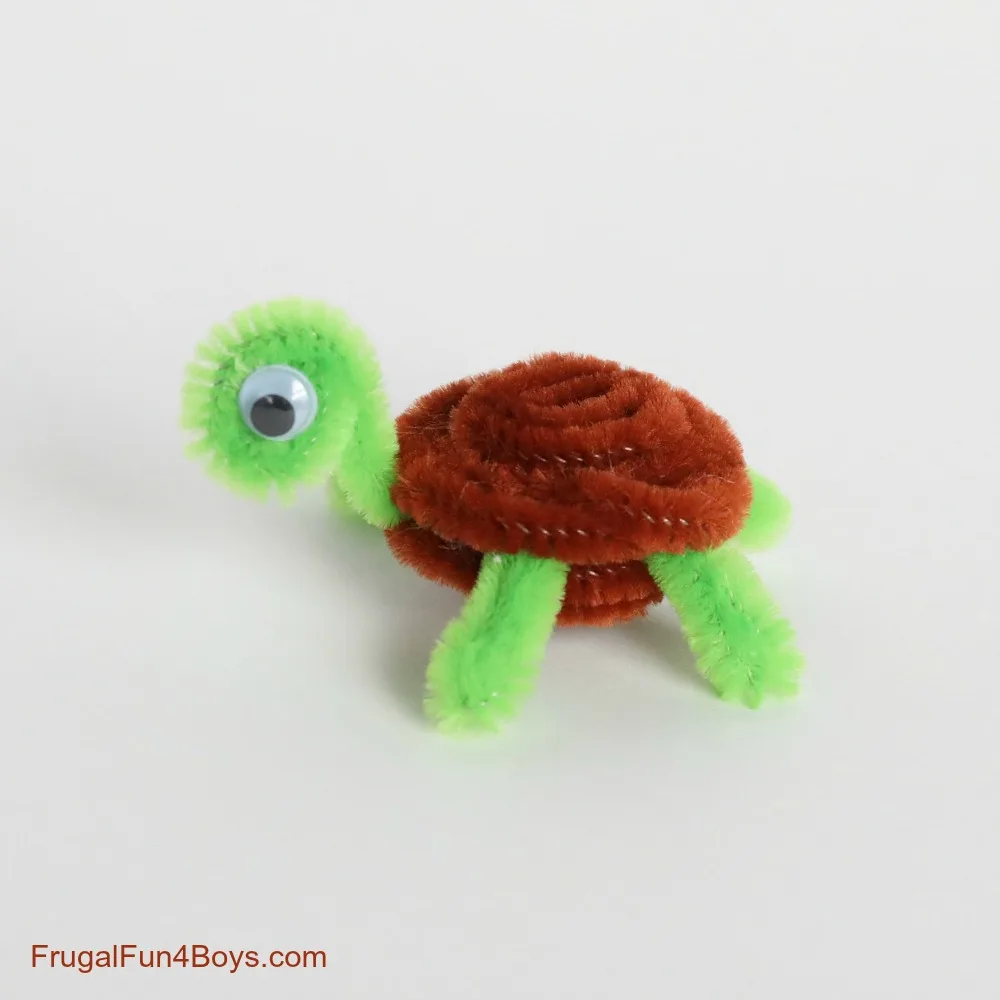 Pipe cleaner animals are a fun and easy craft for kids of all ages. These versatile crafts require minimal materials and can be made with just pipe cleaners and a bit of imagination.
To start, gather a variety of colorful pipe cleaners. You can find these at most craft stores or dollar shops, making this an incredibly affordable activity.
Begin by showing your child how to bend and twist the pipe cleaners into basic animal shapes. For example, you can create a simple snake by coiling a single pipe cleaner.
For more complex animals, use multiple pipe cleaners. Create a turtle by forming a shell with one pipe cleaner and using smaller pieces for the head, legs, and tail.
Encourage your child to experiment with different animals. They can make cats, dogs, birds, or even mythical creatures like dragons.
To add extra flair, consider incorporating other craft supplies like googly eyes or pom-poms. These small additions can bring the animals to life and make them even more engaging for kids.
As your child becomes more comfortable with the technique, challenge them to create more intricate designs. They might surprise you with their creativity and problem-solving skills.
Remember, there’s no right or wrong way to make pipe cleaner animals. The goal is to have fun and let your child’s imagination run wild.
15) Cardboard Tube Monsters
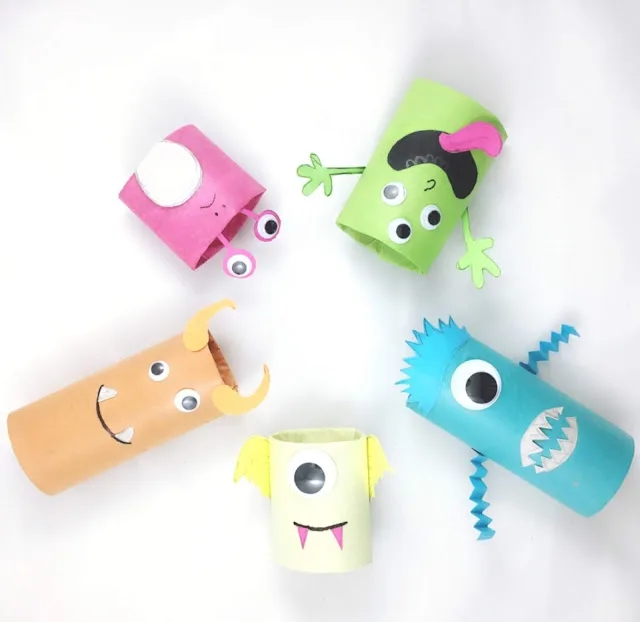
Transform ordinary cardboard tubes into spooky and fun monsters with this simple craft. You’ll need empty toilet paper rolls or paper towel tubes as the base for your creations.
Start by covering the tubes with colored tissue paper. Choose vibrant colors to make your monsters stand out. Secure the paper with glue or tape.
Next, let your imagination run wild as you decorate your monsters. Cut out shapes from construction paper for eyes, teeth, arms, and hair. Glue these onto your tubes to bring your creatures to life.
Add pom poms, googly eyes, or foam stickers to give your monsters extra personality. You can even use markers to draw on additional details like scales, fur, or stripes.
For a unique twist, try making different sized monsters by cutting the tubes to various heights. This adds variety to your monster family.
Don’t forget to give your monsters some flair. Cut strips of paper for tentacles or use pipe cleaners to create wiggly arms and legs. The possibilities are endless!
This craft is perfect for Halloween decorations or a monster-themed party. You can display your creations on a shelf or use them as table centerpieces.
Remember, there’s no right or wrong way to make these monsters. Encourage your kids to be creative and design monsters that are scary, silly, or somewhere in between.
16) Rock Painting
 Rock painting is a fun and inexpensive craft that kids of all ages can enjoy. You only need some smooth rocks, acrylic paint, and brushes to get started. Gather rocks from your backyard or a local park for free.
Before painting, wash the rocks and let them dry completely. This ensures the paint adheres well to the surface. Acrylic paint works best on rocks and comes in a variety of vibrant colors.
Let your kids’ imagination run wild with their rock designs. They can create cute ladybugs, colorful fish, or woodland creatures on their rocks. Simple patterns and shapes are great for younger children to try.
For added flair, use paint markers or Sharpies to draw details on the painted rocks. These tools allow for more precise lines and intricate designs. Encourage your kids to experiment with different techniques.
Once the paint dries, you can seal the rocks with a clear acrylic spray to protect the artwork. This step is optional but helps the designs last longer, especially if the rocks will be placed outdoors.
Painted rocks make great decorations for gardens or potted plants. Your kids can also use them as paperweights or create a fun outdoor tic-tac-toe game. The possibilities are endless with this versatile craft.
17) Paper Bag Puppets
 Paper bag puppets are a classic craft that kids love. They’re easy to make and require minimal supplies, making them perfect for budget-friendly activities.
To start, you’ll need paper lunch bags, construction paper, glue, and markers or crayons. You can also add googly eyes, yarn, or buttons for extra flair.
Choose an animal or character to create. Cut out shapes from construction paper for the features like ears, eyes, and nose. Glue these onto the paper bag to bring your puppet to life.
For a simple project, try making a dog puppet. Cut out floppy ears and a tongue from colored paper. Glue them to the bag and draw on eyes and a nose. Your kids can customize their puppets with spots or different colors.
Cow and animal puppets are another fun option. Use white and black paper to create the distinctive pattern on the bag. Add horns and eyes to complete the look.
Let your children’s imagination run wild with character designs. They can make storybook characters like the Cat in the Hat or invent their own unique creatures.
Once finished, kids can put on puppet shows or use them for storytelling. This craft encourages creativity and provides hours of entertainment.
Paper bag puppets are versatile and can tie into various themes or lessons. They’re great for classroom activities, rainy day fun, or birthday parties.
18) Milk Carton Birdhouse
 Creating a birdhouse from a milk carton is a fun and eco-friendly craft for kids. This project is perfect for teaching children about recycling and wildlife conservation.
Start by thoroughly cleaning an empty milk carton and letting it dry completely. This ensures a clean surface for the birds and prevents mold growth.
Next, cut a hole in the front of the carton for the entrance. The hole should be about a third of the way up from the bottom. You can make it circular or any shape you prefer.
Paint the entire carton with acrylic paint to protect it from the elements. Choose earth tones to blend with nature or bright colors for a cheerful look.
Decorate the birdhouse with natural materials like twigs, leaves, or bark. You can also use craft supplies such as buttons, stickers, or tissue paper for collage.
Add a small perch below the entrance hole using a twig or popsicle stick. This gives birds a place to rest before entering.
To hang the birdhouse, punch holes near the top and thread sturdy string or wire through them. Make sure it’s securely fastened.
Place some straw or hay inside to provide nesting material for the birds. This extra touch will make your birdhouse more inviting.
Hang your completed birdhouse in a sheltered area of your yard, away from direct sunlight and strong winds. Watch as birds discover their new home!
19) Cereal Box Picture Frames
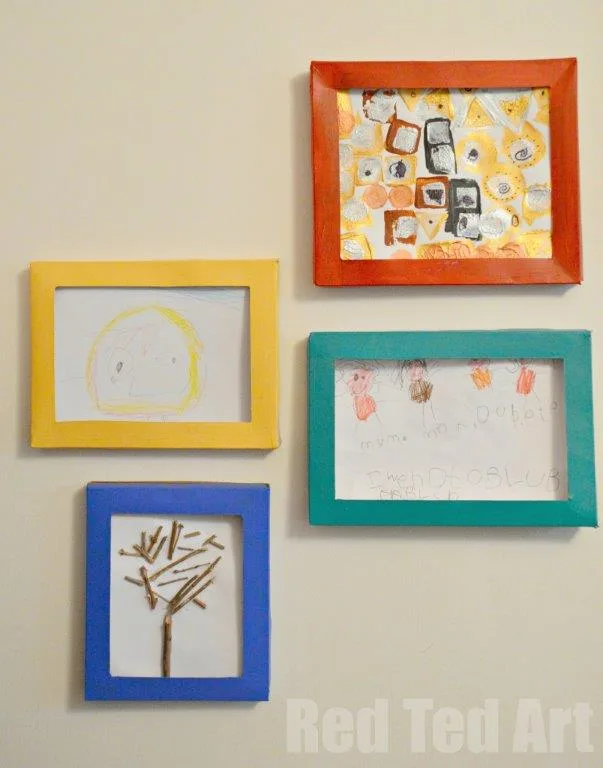 Looking for a creative way to display your child’s artwork? Cereal box picture frames offer a fun and eco-friendly solution. This craft repurposes empty cereal boxes into stylish frames, perfect for showcasing drawings, photos, or small crafts.
To start, carefully disassemble a cereal box and cut out a rectangular frame shape from one of the larger sides. You can customize the size to fit your child’s artwork.
Next, let your kids decorate the frame. They can paint it, cover it with colorful paper, or add stickers and glitter. The possibilities are endless, allowing their creativity to shine.
For a neat finish, consider turning the cereal box inside out. The plain gray side provides an excellent base for paint or other decorations, often requiring just one coat.
Once decorated, fold and glue the edges to create a sturdy frame structure. You can add a cardboard backing to hold the artwork in place.
This craft not only provides a fun activity but also teaches children about upcycling and eco-friendly practices. It’s a great way to reduce waste while creating something useful and personalized.
Cereal box picture frames make wonderful gifts for grandparents or decorations for your child’s room. You can even create a gallery wall of your kid’s evolving artistic skills over time.
20) Pom-Pom Garland
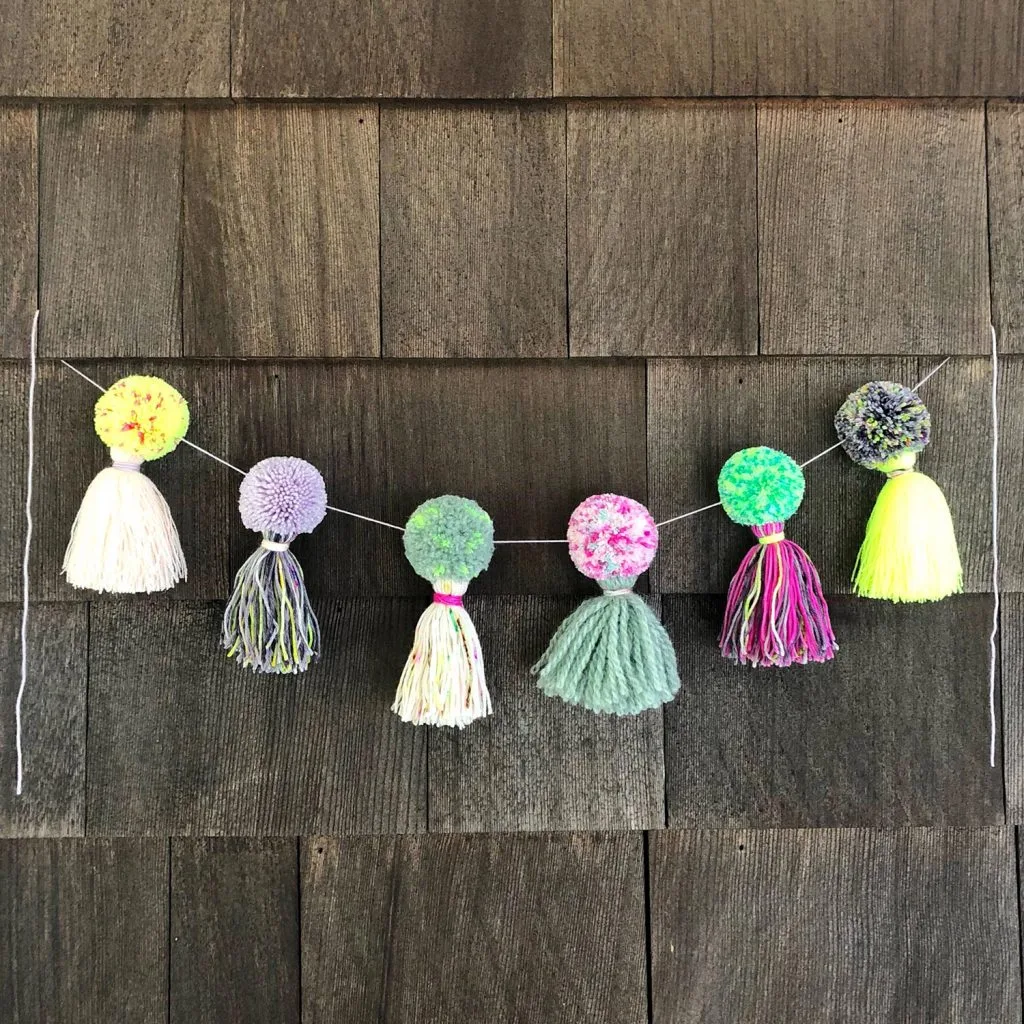 Pom-pom garlands are a delightful and inexpensive craft that kids will love making. These colorful decorations can brighten up any room and are perfect for parties or everyday decor.
To start, you’ll need yarn in various colors, scissors, and a piece of cardboard. Cut the cardboard into a small rectangle and wrap yarn around it many times. The more you wrap, the fluffier your pom-poms will be.
Carefully slide the yarn off the cardboard and tie a piece of yarn tightly around the middle. Cut through the loops on both ends to create your pom-pom. Trim any uneven edges to make it neat and round.
Repeat this process to make as many pom-poms as you’d like for your garland. You can create a rainbow effect or stick to a specific color scheme.
Once you have enough pom-poms, it’s time to string them together. Thread a long piece of yarn through a large needle. Carefully push the needle through the center of each pom-pom, sliding them onto the yarn one by one.
Space the pom-poms as close or far apart as you like. Tie knots on either side of each pom-pom to keep them in place if needed. When you’re satisfied with the length, tie off the ends.
Your pom-pom garland is now ready to hang! Drape it across a mantel, along a bookshelf, or in a child’s bedroom for a playful touch. This craft is not only fun to make but also teaches kids basic hand-eye coordination and color theory.
21) Tissue Paper Flowers
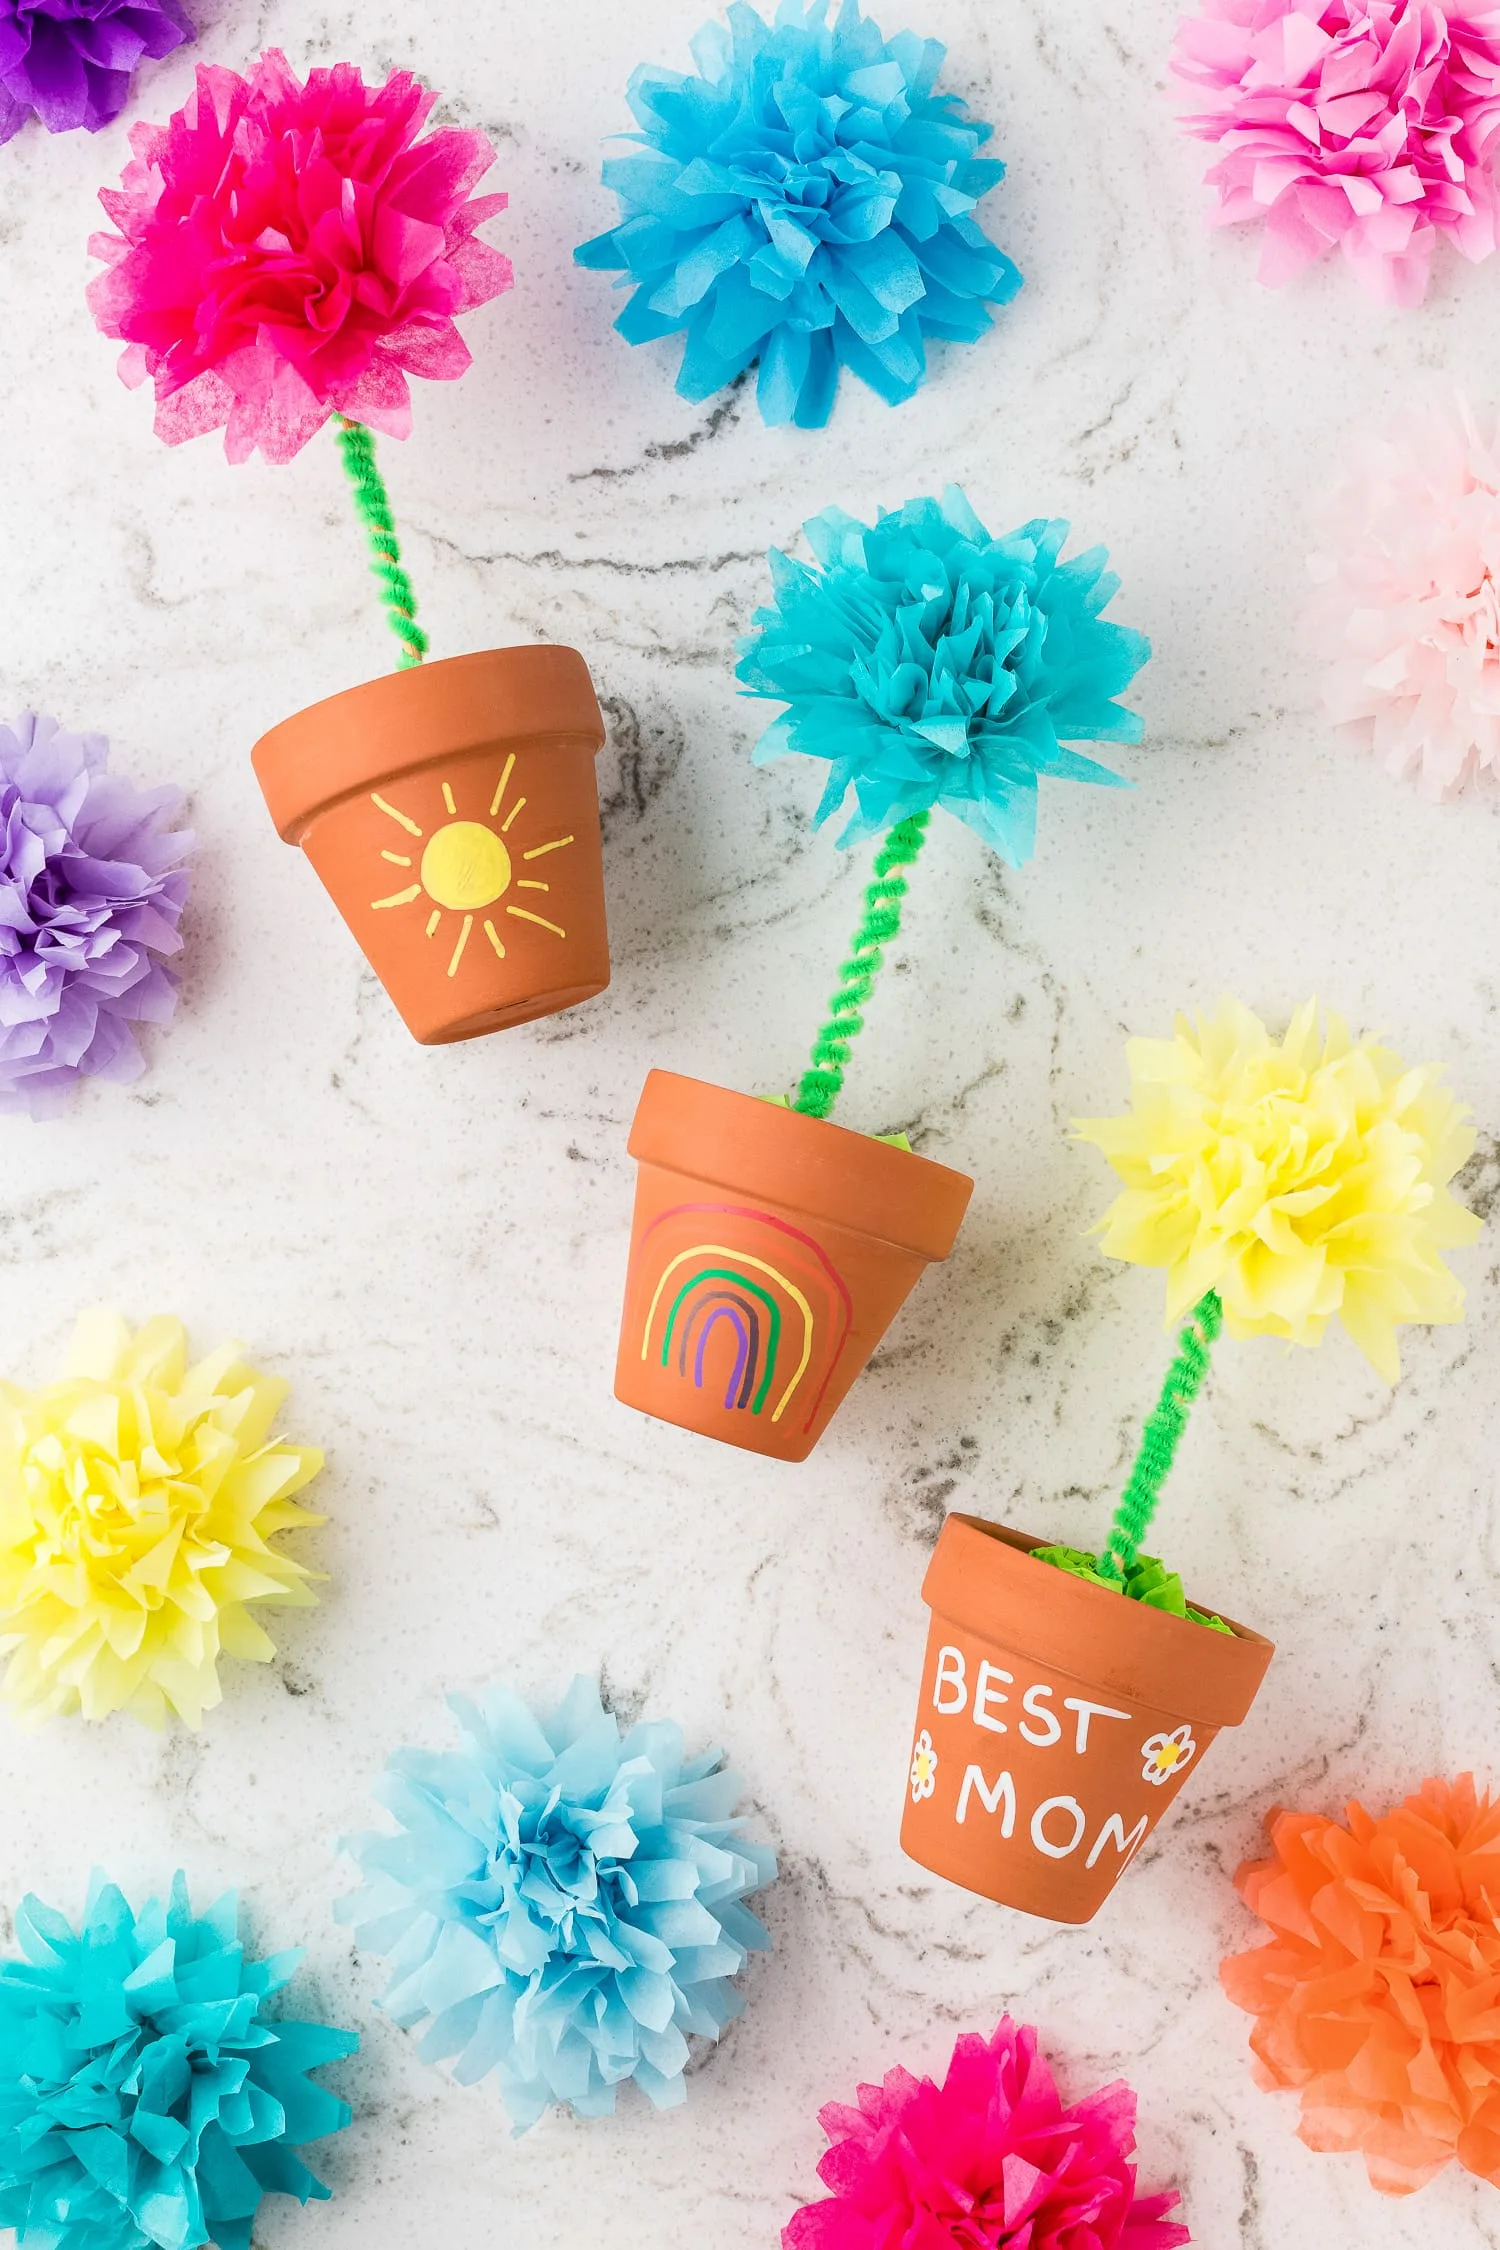 Tissue paper flowers are a delightful and inexpensive craft for kids. You’ll need colorful tissue paper, pipe cleaners, and scissors to get started.
Begin by cutting tissue paper into 5-inch x 6 ½ inch sections. Stack about 6 pieces of tissue paper on top of each other.
Next, fold the stack accordion-style, creating even pleats from one end to the other. Once folded, wrap a pipe cleaner around the center of the tissue paper stack and twist it to secure.
Gently separate the layers of tissue paper, pulling them upwards one by one. As you do this, the flower will start to take shape. Fluff and adjust the petals to create a fuller appearance.
You can experiment with different colors and sizes to create a variety of flowers. Try making daisies using Q-tips for the centers or create a bouquet of multicolored blooms.
These tissue paper flowers make great decorations for parties or bedrooms. They can also be a thoughtful homemade gift for friends and family.
For a fun variation, try creating a rabbit craft using tissue paper. Use a rabbit template and decorate it with small pieces of tissue paper to create a fluffy texture.
22) Leaf Animal Collage
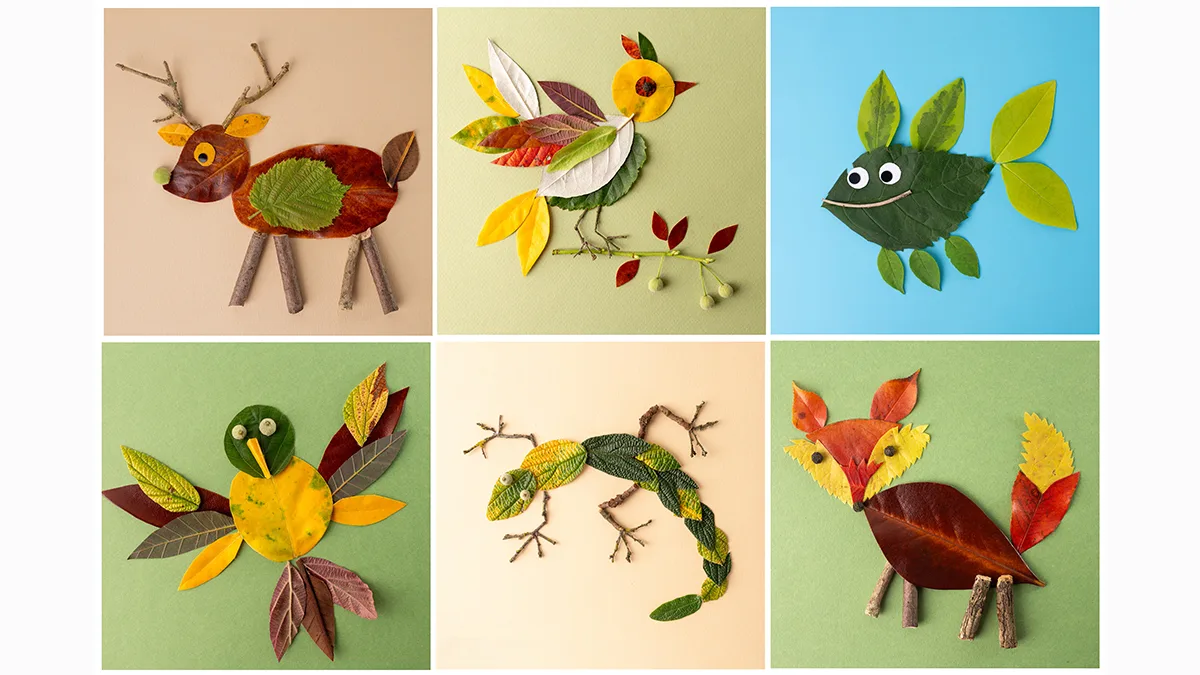 Creating leaf animal collages is a fun and inexpensive craft that lets kids unleash their creativity using materials found in nature. This activity is perfect for autumn when colorful leaves are abundant.
To start, take your kids on a nature walk to collect a variety of leaves in different shapes, sizes, and colors. Encourage them to look for leaves that remind them of animal features like ears, tails, or wings.
Once you have your leaves, gather some basic supplies like paper, glue, and markers. You might also want to include googly eyes for added whimsy.
Let your children’s imagination run wild as they arrange the leaves on paper to form animal shapes. A large oval leaf could become a lion’s face, while long, narrow leaves might form a bird’s tail.
Glue the leaves in place once your child is happy with their arrangement. They can add details like eyes, noses, or whiskers using markers or additional craft supplies.
This craft teaches kids about nature while developing their fine motor skills and artistic abilities. It’s also a great way to discuss different animals and their features.
Leaf animal collages can be as simple or complex as your child wants. Younger kids might create basic shapes, while older ones could craft more intricate designs.
Remember to preserve your child’s leaf animal artwork by laminating it or framing it under glass. This will protect the delicate leaves and create a lasting memento of their creativity.
23) Clothespin Airplanes
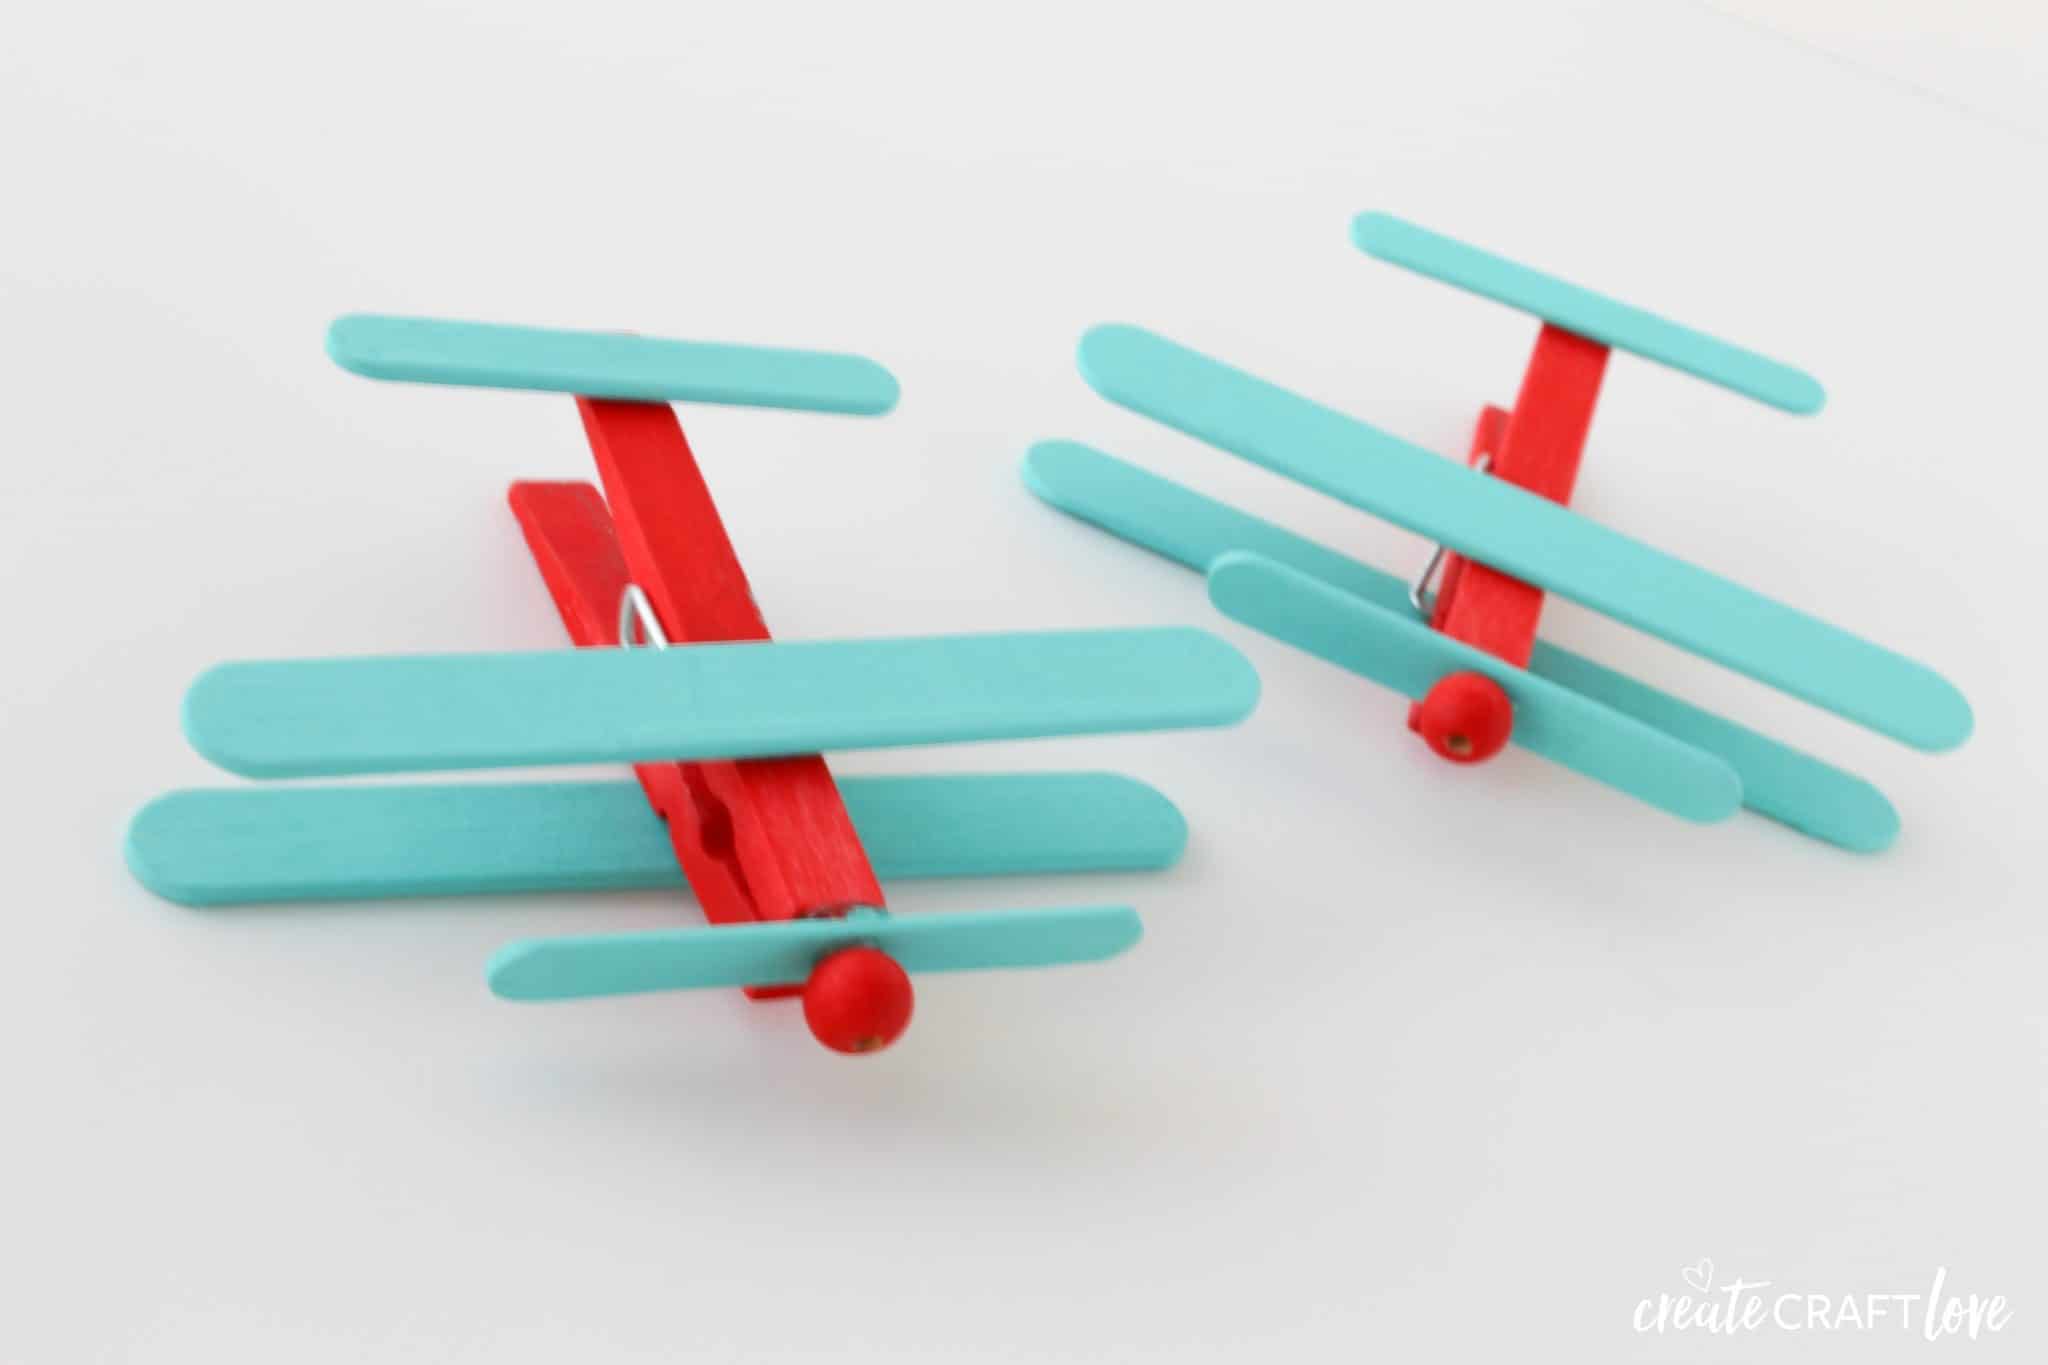 Clothespin airplanes are a fun and easy craft that kids will love. You can create these cute little planes using simple materials you likely already have at home.
To make clothespin airplanes, you’ll need clothespins, popsicle sticks, and glue. Start by disassembling the clothespin to paint the wooden parts if desired.
For the wings, attach two regular popsicle sticks to the top and bottom of the clothespin. Glue a mini popsicle stick to the back for the tail.
You can add a small piece of popsicle stick to the front as a propeller. Get creative with decorations – use markers, paint, or stickers to personalize each plane.
This craft is perfect for various themes, from transportation units to party favors. Kids can even make these as gifts for friends or family.
The best part? These airplanes are incredibly budget-friendly. You can often find the materials at dollar stores or craft shops for very little cost.
Encourage your children to imagine adventures for their new toy planes. They can create stories, plan “flights” to exotic destinations, or simply enjoy zooming them around the room.
Remember to supervise younger children when using glue and small parts. With a little guidance, kids of various ages can enjoy making these charming clothespin airplanes.
24) Seashell Jewelry
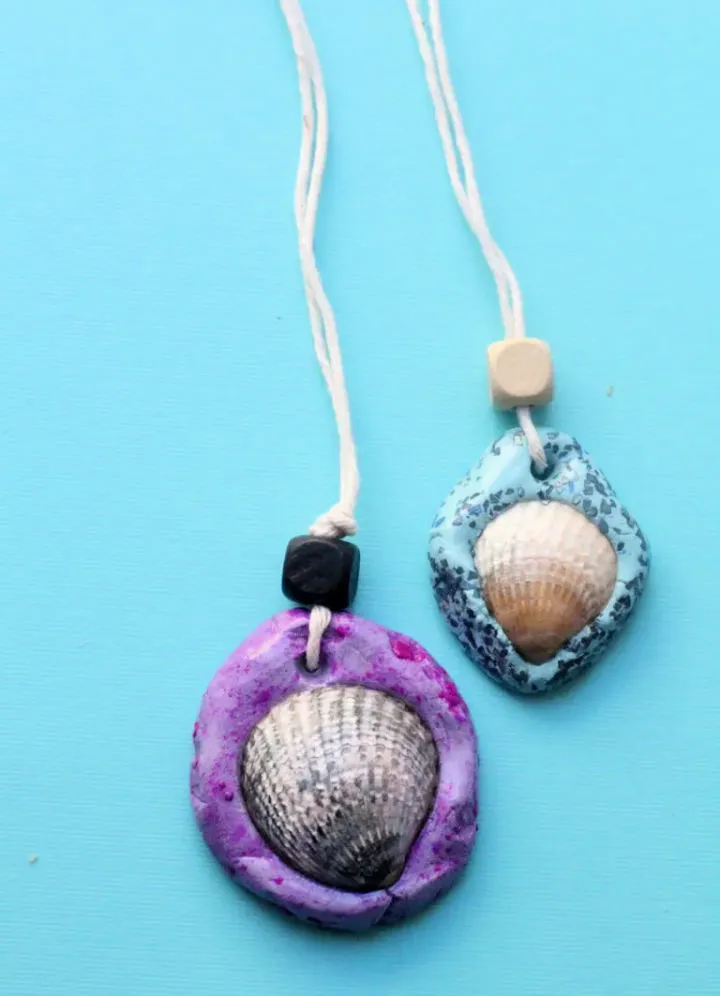 Seashell jewelry is a fun and inexpensive craft that lets kids create unique accessories. You only need a few materials to get started: seashells, string or thin cord, and a small drill or needle.
Begin by collecting seashells from your beach trips or purchasing them from a craft store. Choose shells with natural holes or ones that are easy to drill through.
For younger children, use a needle to thread the string through pre-holed shells. Older kids can learn to use a small hand drill to make holes in sturdier shells under adult supervision.
Let your children design their own necklaces, bracelets, or anklets by stringing the shells in patterns they like. Mix in beads or small charms for added flair.
Seashell necklaces can be made in various styles, from simple single-shell pendants to elaborate multi-shell designs. Encourage your kids to experiment with different layouts.
To finish the jewelry, tie off the ends securely. You can add clasps for a more polished look, or simply tie the ends together for an adjustable fit.
This craft allows kids to create wearable memories of summer beach trips. It’s also a great way to teach basic jewelry-making skills and encourage creativity.
25) Foam Cup Snowmen
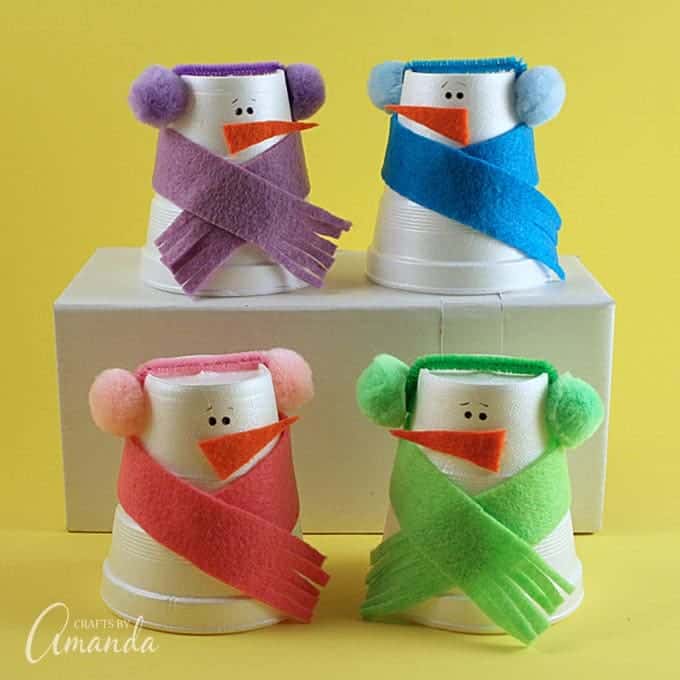 Create adorable snowmen using simple foam cups for a fun winter craft activity. This project is perfect for kids of all ages and requires minimal materials.
Start by gathering foam cups, felt, glue, and scissors. Turn the cup upside down to form the snowman’s body. Cut a strip of felt about 1 inch wide to make a scarf.
Wrap the felt scarf around the cup, leaving space at the top for the face. Glue it in place. Fringe the ends of the scarf to give it a realistic look.
For the face, cut small circles from black felt for eyes and buttons. Use orange felt to create a triangle nose. Glue these features onto the cup.
Add a hat by cutting a small circle of felt for the brim and a slightly smaller circle for the top. Glue these together and attach to the snowman’s head.
You can personalize your snowmen by adding extra details. Try making tiny earmuffs, a vest, or even stick arms using small twigs.
This craft is not only fun but also teaches children about shapes and spatial awareness. It’s a great way to spend a chilly afternoon indoors.
Foam cup snowmen are easy to make in batches, perfect for classroom projects or winter-themed parties. You can create a whole family of snowmen in different sizes using various cup sizes.
Materials Needed for Easy Crafts
Gathering the right materials is key for successful kids’ crafts. You’ll need a mix of recyclable items from around your home and some basic craft supplies.
Recyclable Items
Start by collecting items you might normally throw away. Empty toilet paper rolls and paper towel tubes are versatile craft bases. Cardboard boxes of various sizes can be transformed into fun projects. Save plastic bottles, egg cartons, and glass jars for creative reuse.
Newspapers and magazines provide colorful paper for collages. Old clothes or fabric scraps work well for textile crafts. Don’t forget about bottle caps, corks, and plastic lids – these small items can become eyes, wheels, or decorative elements.
Popsicle sticks, leftover yarn, and string are also valuable additions to your craft supply stash.
Basic Craft Supplies
Stock up on essential craft supplies to complement your recyclables. Glue sticks and white glue are must-haves for adhering materials. Safety scissors allow kids to cut paper and lightweight materials safely.
Crayons, markers, and colored pencils provide endless color options. Watercolor paints and brushes add another dimension to artistic projects.
Googly eyes, buttons, and sequins make great decorative elements. Don’t forget pipe cleaners, pom-poms, and craft foam sheets for added texture and variety.
Tape (both clear and colorful washi tape) and a hole punch round out your basic supply list. With these materials on hand, you’ll be ready for countless creative adventures.
Benefits of Crafting for Kids
Crafting offers numerous advantages for children’s development. It fosters essential skills and provides a fun, engaging way for kids to express themselves while learning.
Enhancing Creativity
Crafting encourages creative thinking and self-expression in children. When you provide your kids with materials and guidance, they can explore their imagination freely. This process helps them develop problem-solving skills as they figure out how to turn their ideas into tangible creations.
Crafting also exposes children to different textures, colors, and shapes, expanding their artistic vocabulary. As they experiment with various materials, they learn to combine elements in unique ways, fostering innovation and original thinking.
You’ll notice your child’s confidence grow as they complete projects and showcase their work. This sense of accomplishment can motivate them to tackle more complex challenges in other areas of life.
Developing Fine Motor Skills
Engaging in crafts helps children refine their fine motor skills, which are crucial for many everyday tasks. As your child cuts paper, threads beads, or molds clay, they’re strengthening the small muscles in their hands and improving hand-eye coordination.
These activities help develop:
- Finger dexterity
- Grip strength
- Precision in small movements
Improved fine motor skills benefit your child in various ways, from better handwriting to easier use of utensils and tools. Crafting also aids in developing bilateral coordination, as many projects require using both hands simultaneously.
Regular crafting can significantly enhance your child’s manual dexterity, preparing them for more advanced tasks as they grow older.